The FMR normalization sub-workflow transforms (preprocessed) functional FMR data files into VTC files in coregistered anatomical space. While this space can be the "native" space of the intra-session 3D T1 anatomical data set, the transformation usually goes beyond native sapce to produce functional VTC data files in MNI, Talairach or ACPC space. To run successfully, this workflow requires that the FMR-VMR coregistration sub-workflow has been performed as well as eventually (at least one) VMR normalization sub-workflow. With all relevant coregistration and normalization files, the FMR normalization workflow can be setup in the Preprocessing Workflow Definition dialog and started from the workflows tab of the data analysis manager.
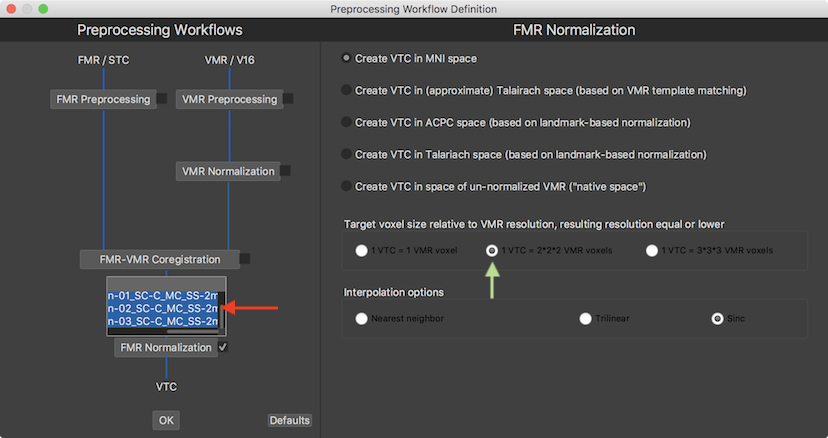
When checking the FMR Normalization inclusion box, a input box appears presenting a list of all available functional documents. In the screenshot above, the generic names of the 3 preprocessed functional runs (see red arrow) have been selected as input of the normalization process in order to transform them into 3 VTC files per subject in normalized space as output. The options in the FMR Normalization parameter field on the right side allow to specify the desired target space. The selected space must match the space that had been chosen earlier for the (preprocessed) VMR document of the same session. Since MNI space had been used earlier for the anatomical document for the example data, the Create VTC in MNI space option is selected (default option) at the top of the parameters page. In case that the anatomical data would have been transformed into multiple spaces (with more than one VMR Normalization workflow), one would have to define a separate FMR Normalization workflow for each target space. The Target voxel size relative to VMR resolution field allows to adjust the resolution of the resulting normalized (VTC) data in relation to the resolution of the anatomical (usually 1mm iso-voxel) data. Since in the example document the resolution of the scanned functional data is 2mm x 2mm x 2mm, the 1 VTC = 2x2x2 VMR voxels option has been selected instead of the default option 1 VTC = 3x3x3 VMR voxels (see green arrow above). Furthermore the Interpolation options field allows to specify the spatial interpolation approach when resampling the data, which has been kept at the default Sinc option. When using sinc interpolation it is advised to check whether the GPU sinc interpolation setting has been turned on (if supported by the used computer) since parallelized processing can substantially reduce processing time (typically 10x).
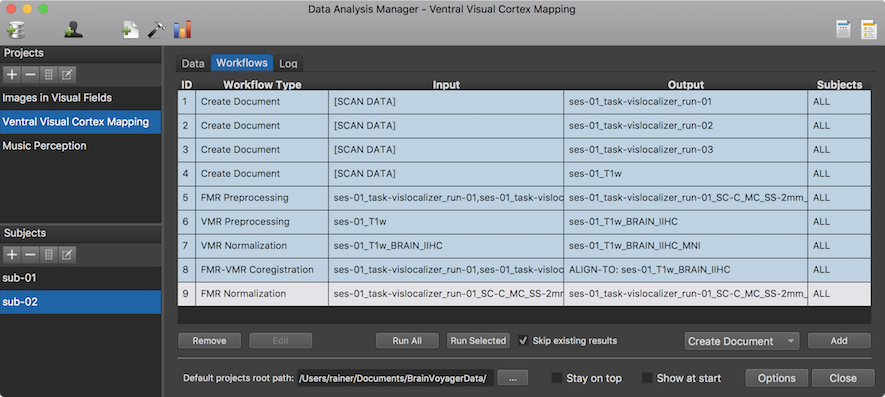
After clicking the OK button, the specified FMR Normalization workflow appears in the Worfklows tab (see row 9 in the Workflows table shown above). To execute it, the Run Selected button can be clicked after selecting the normalization workflow in the table. The Log tab will report the progress of the workflow involving in this case the creation of 6 VTC documents in MNI space (3 normalized runs 2 subjects) using the corresponding FMR documents as input.
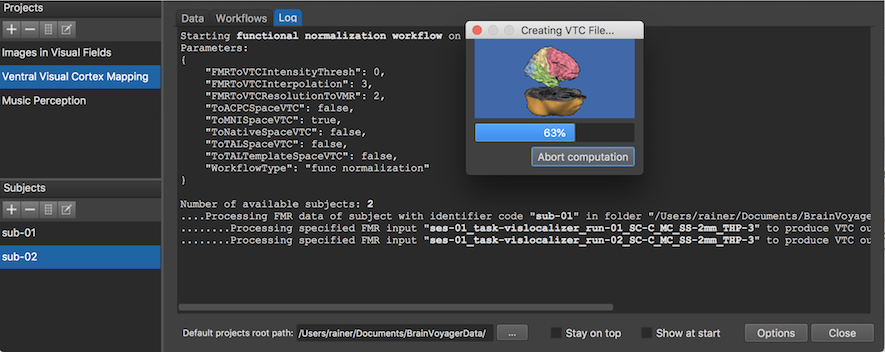
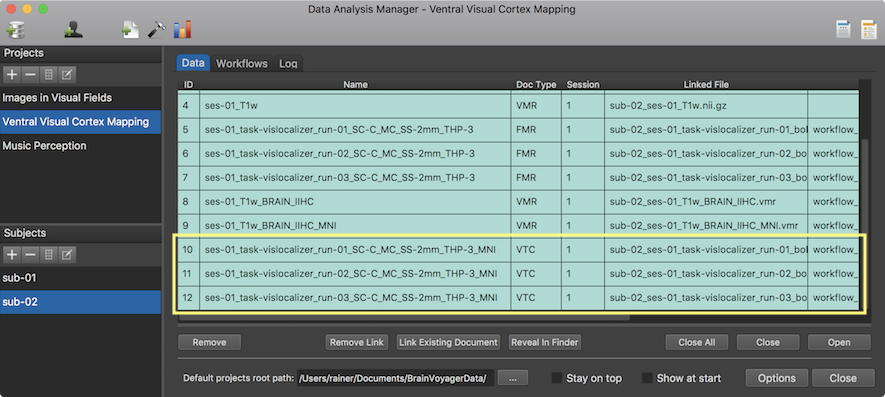
The screenshot above shows the Log tab during processing the workflow at the stage when the second VTC file is created for the first subject. After the workflow has been executed, the program switches to the data tab where the new MNI-space VTC files are listed for each subject (see screenshot below).
Note that you can double-click a VTC file in the single-subject data table to open it, but you may have to select the corresponding VMR file (in the matching space) the first time to associate the VTC file with the selected VMR document. When clicking the same VTC document in future occassions, the associated VMR data set is opened automatically and the VTC file is linked to the VMR document.
After the VTC creation has been finished, the normalized anatomical (VMR) and functional (VTC) data can be used as input for statistical analyses workflows.