The available routines and parameters of the FMR Preprocessing sub-workflow are largely identical to those of the conventional single-document FMR preprocessing options as described in the Preprocessing chapter. As described in topic Preprocessing Workflows, preprocessing workflows are defined here in the Preprocessing Workflow Definition dialog that can be invoked e.g. by clicking the Preprocessing Workflow icon in the main toolbar of the Data Analysis Manager. To inspect and adjust preprocessing options for FMR preprocessing, the FMR Preprocessing button in the invoked Preprocessing Workflow Definition dialog can be clicked. In order to specify input data for this sub-workflow, the selection box on the right side of the FMR Preprocessing workflow buttons has been turned on (checked) in the screenshot below. This opens a list of documents available for FMR preprocessing. In the example screenshot below the FMR document input list contains the 3 functional (FMR) documents that have been created earlier using the Create Document workflow for the example project. In order to process all three runs for all subjects in one FMR preprocessing sub-workflow, all three entries have been selected. The right side shows the current parameter choices for this workflow. While the default parameters could be used for the selected FMR preprocessing sub-workflow, a few changes have been made as shown in the snapshot below (green arrows).
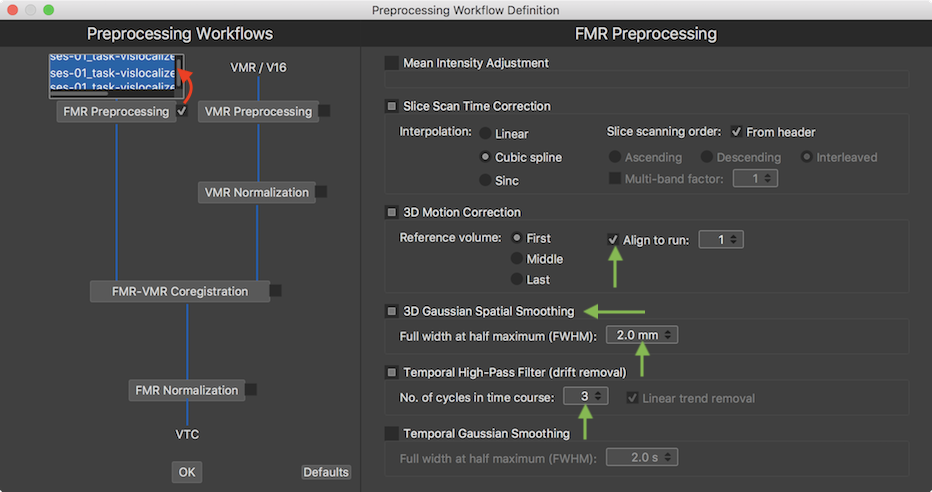
The Mean Intensity Adjustment setting (off by default) and the Slice Scan Time Correction settings have not been changed from their default settings. Since there are multiple runs of the same experiment, the Align to run option has been turned on in the 3D Motion Correction section (on by default) in order to bring all three functional runs in the same space. The default run number 1 has been kept in the Align to run spin box as well as the First selection for the Reference volume option, i.e. the volumes of all 3 runs will be aligned to the first volume of the first run during motion correction. The 3D Gaussian Spatial Smoothing section has been turned on and the Full width at half maximum value has been changed to value 2.0 in order to slightly spatially smooth the data (the functional data in this example has a spatial resolution of 2mm x 2mm x 2mm). Finally the No. of cycles in time course cut off value in the Temporal High-Pass Filter section (on by default) has been changed to value 3.
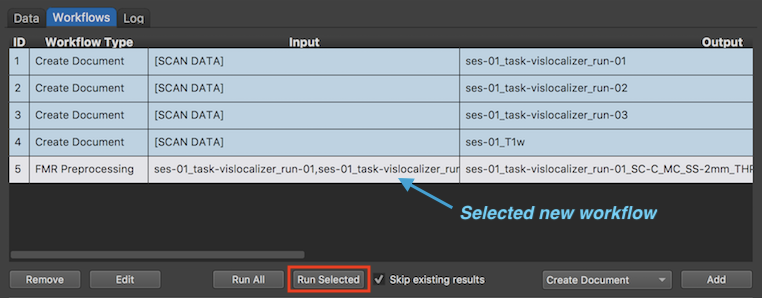
While more than one workflow can be defined at this point, it is currently recommended to define one sub-workflow after the other the dialog, i.e. closing the workflow window by clicking the OK button and re-entering it to define more preprocessing workflows. For demonstration purposes, the specified FMR Preprocessing workflow is executed right after its definition. The screenshot of the Workflows tab above shows the new workflow in the Workflows table (entry 5), which is identified by the "FMR Preprocessing" label in the Workflow Type column. Since the same FMR preprocessing settings are used for 3 FMR input documents, the Input column lists all three documents and the Output column lists the generic document names of the output (preprocessed) FMR documents. Note that the output document names contain sbustrings indicating the selected preprocessing steps and parameter settings (e.g. "SC-C" indicates inclusion of slice scan time correction with cubic spline interpolation, "MC" indicates inclusion of 3D motion correction (with trilinear-sinc interpolation), "SS-2mm" indicates inclusion of spatial Gaussian smooting with a FWHM value of 2 mm, and "THP-3" indicates drift removal with a high-pass temporal filter with a cut of point of 3 cycles per time point).
Note. Since BrainVoyager v21.0, the detailled preprocessing options are also stored in a "parameters.json" file in the workflow output folder. This file can be opened in any text editor and also conveniently using the Open JSON item in the File menu of BrainVoyager. The parameters are also stored in the BrainVoyager database. The separation in different workflows, output folders and file names support comparison of preprocessing pipelines in case that multiple workflows are defined that use the same input documents but apply different preprocessing steps and/or different parameters.
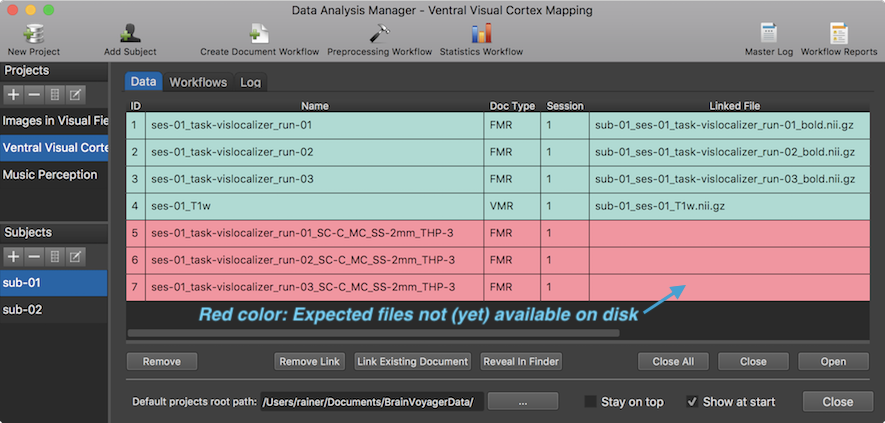
If one switches to the Data tab before running the workflow (see snapshot above), the documents appear already with their generic names when selecting any subject in the Subjects pane. The entries are colored red since the expected files are not yet available on disk. To create the preprocessed FMR documents for each subject, the Run Selected button in the Workflows tab needs to be clicked after selecting the preprocessing workflow (here: entry 5). Note that one could also use the Run All button, which would skip running workflows 1-4 in case that the Skip existing results option is turned on.
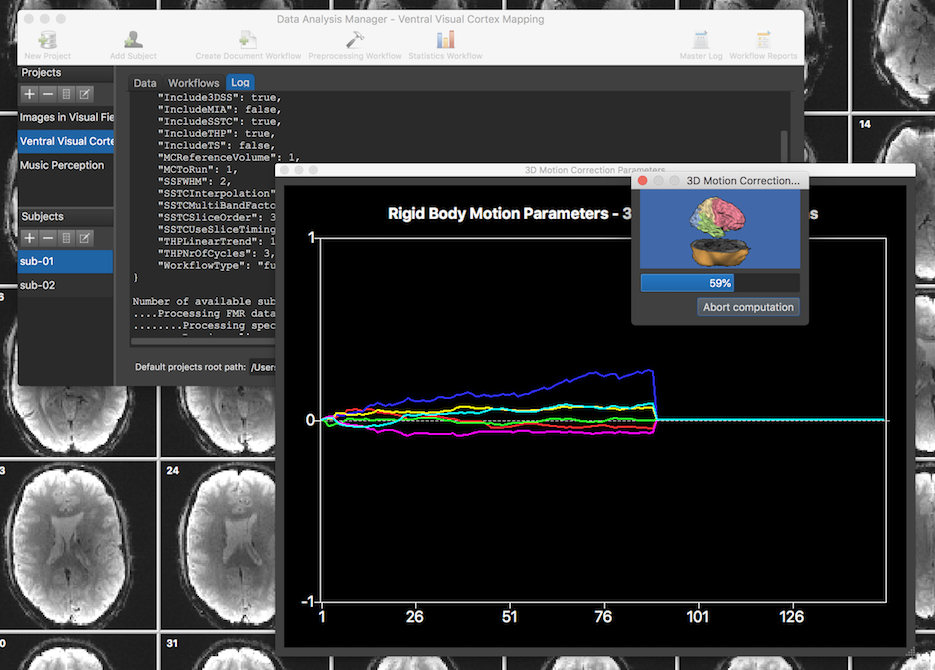
The screenshot above was taken during execution of the FMR preprocessing workflow. At each moment, the Log tab shows which subject and sub-process is exceuted at each moment in time. The Data Analysis Manager calls standard routines of BrainVoyager to process the input data of all runs and subjects; in the screenshot above, motion correction is running of the currently processed run as revealed by the motion parameter plot and a standard BrainVoyager Progress dialog.
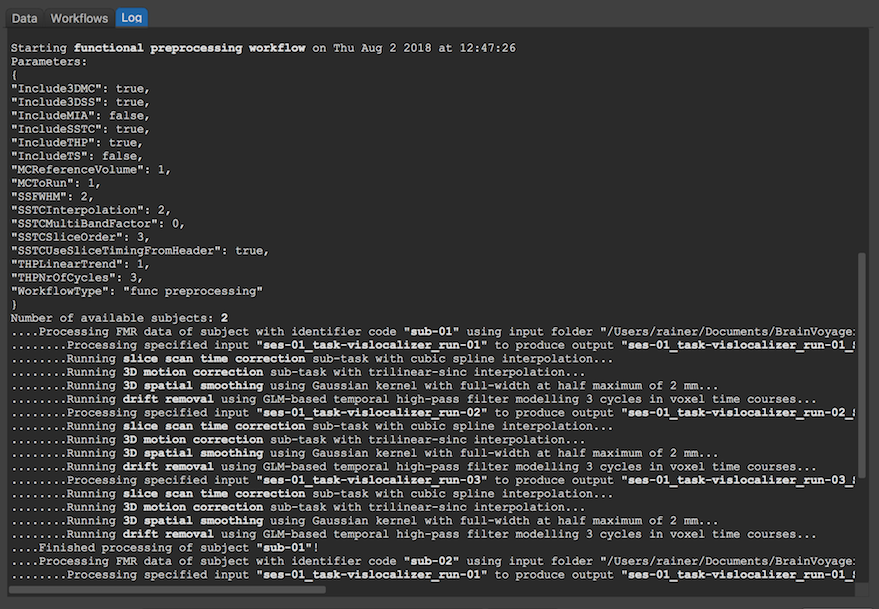
The screenshot above shows part of the logged information showing on top the parameters used for functional preprocessing, i.e. which preprocessing step has been included and which parameters have been set. Note that these parameters are also stored in the "parameters.json" file in the workflow output folder. By comparing the logged time at the start and at the end of the workflow, it can be revealed that the whole FMR preprocessing pipeline of the 6 FMR documents (3 runs of 2 subjects) took about 10 minutes.
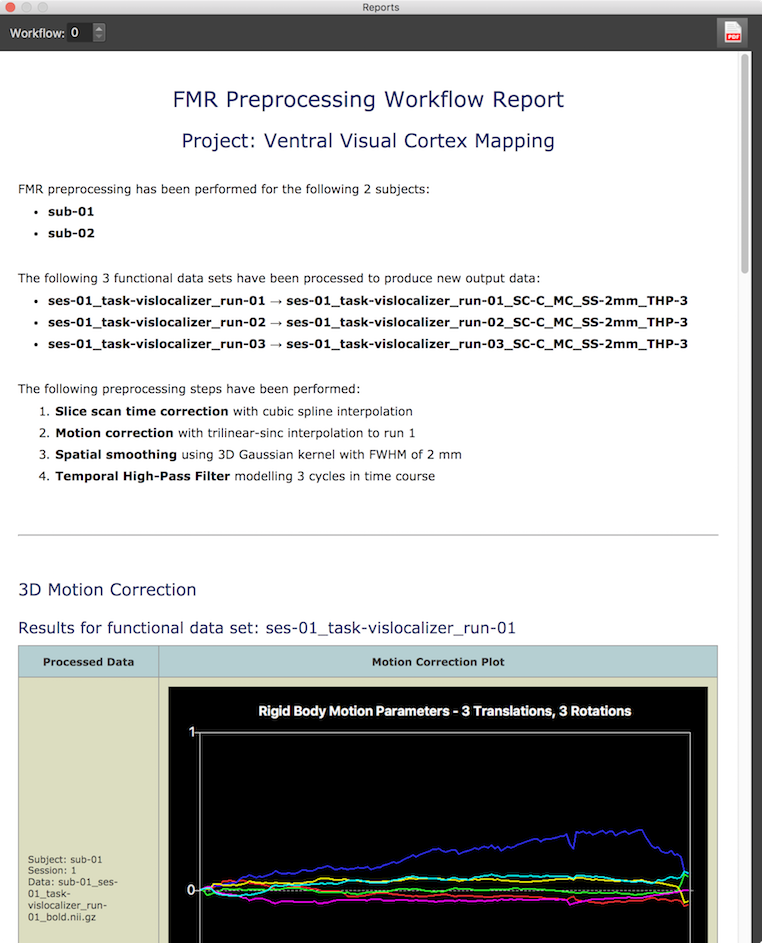
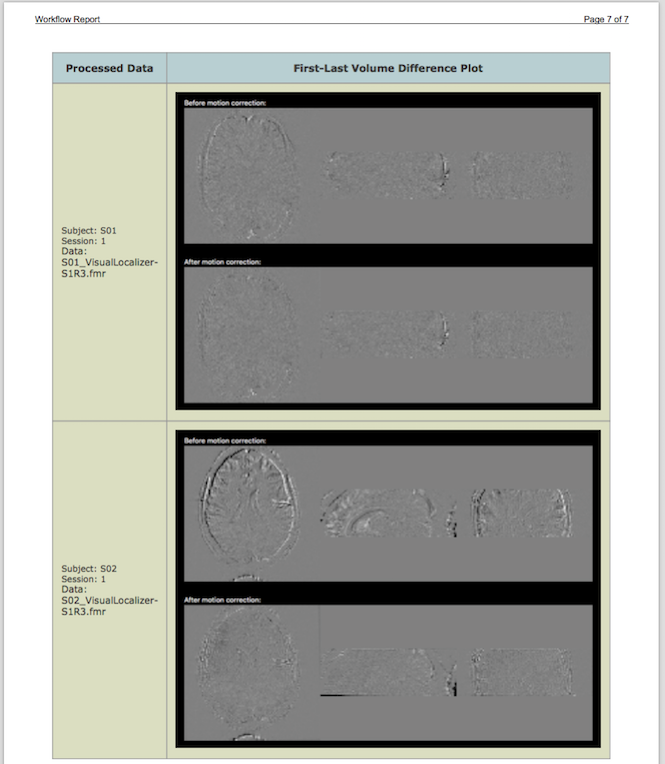
The screenshot above shows the begin of the generated report for the FMR preprocessing workflow summarizing which data files (3 per subject) have been processed and which operations and parameters have been used. The report also contains images showing the results of motion correction for each run and all (here only 2) subjects. The screenshot above shows the motion parameter plot for the first run of the first subject out of all 6 motion parameter plots included in the report. The screenshot below shows difference images before and after motion correction between the last time point of each run and the first time point of run 1 to whcih all data has been aligned. The difference images reveal that there was more substantial motion in the data of subject 2 as indicated by the more "embossed" difference image between last volume of run 3 and first volume of run 1 before motion correction; it is also visible that motion correction worked well since the lower difference image after motion correction shows much less differenced between the two volumes.
While not relevant for using the software, the screenshot below shows the generated folder structure and data files for the first subject. The workflow folder is a sub-folder of the "derivatives" folder of the project and it is named "workflow_id-5_type-1_name-funcprocessing". The workflow folder name uses a unique id number ("here id-5"), which is the workflow number assigned in the Workflows table. It also identifies the type of workflow performed by both a type id ("type-1") as well as a type name ("name-funcpreprocessing").
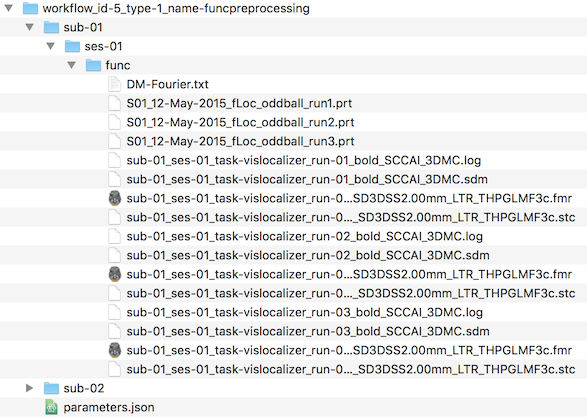
The "func" folder contains standard BrainVoyager files including the protocols of the 3 runs (extracted and converted from the JSON files in the raw BIDS data folder), the preprocessed FMR-STC files and the motion correction log and SDM files that contain the motion parameters as confound predictors, which can be used in the context of GLM analyses. The workflow folder also contains the "parametrs.json" file, which stores the same values as shown at the begin of the workflow's log file.