After creating functional and anatomical documents, preprocessing workflows are usually defined and executed next. The preprocessing workflow setup is very comprehensive and powerful since it includes many sub-workflows for the most important functional and anatomical preprocessing steps as well as FMR-VMR coregistration and MNI/Talairach normalization functionality. As a fast and efficient approach to setup preprocessing workflows, predefined template workflows can be applied to new projects since BrainVoyager v21.0. After defining and running a preprocessing pipeline for all data of all subjects, the project will contain normalized anatomical (VMR) and functional (VTC) data that can be used for running statistical group analyses workflows.
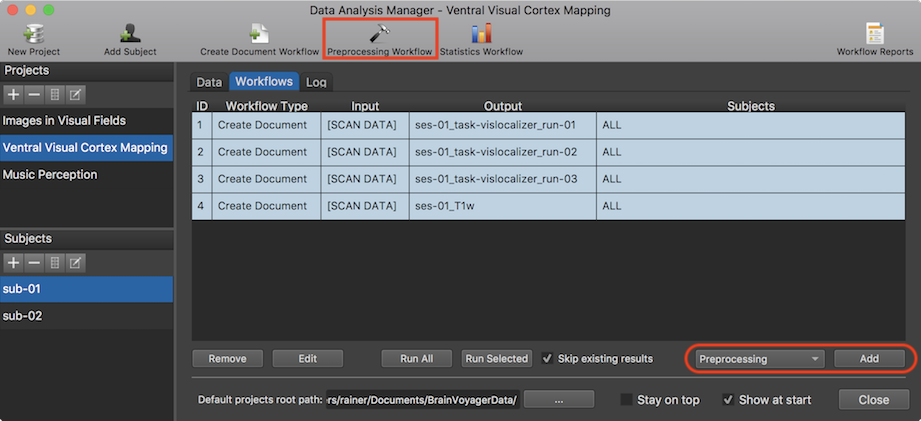
In order to specify a preprocessingn pipeline, the Preprocessing Workflow icon in the main toolbar of the Data Analysis Manager window can be clicked (see screenshot below). Alternatively the Add button in the Workflows tab can be used after selecting the "Preprocessing" entry in the Workflows selection box on the left side of the Add button (see screenshot below).
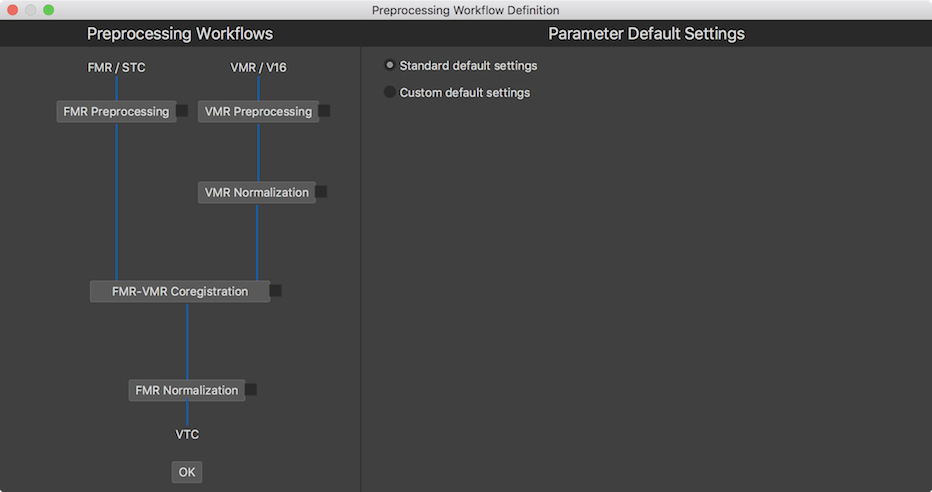
After clicking the Preprocessing Workflow icon (or the Add button), the Preprocessing Workflow Definition dialog will appear (see screenshot below). The dialog allows to define several sub-workflows that are shown in a top-to-bottom pipleline view on the left side, including FMR Preprocessing, VMR Preprocessing, VMR Normalization, FMR-VMR Coregistration and FMR Normalization. When launching the dialog, the right side shows options for default settings.
After selecting a sub-workflow by clicking its button on the left side, operations and parameters are displayed on the right side that can be modified to tailor processing of the selected sub-workflow to the needs of the user. In the screenshot below, the FMR Preprocessing button has been clicked in the pipeline view on the left side to reveal the corresponding settings on the right side.
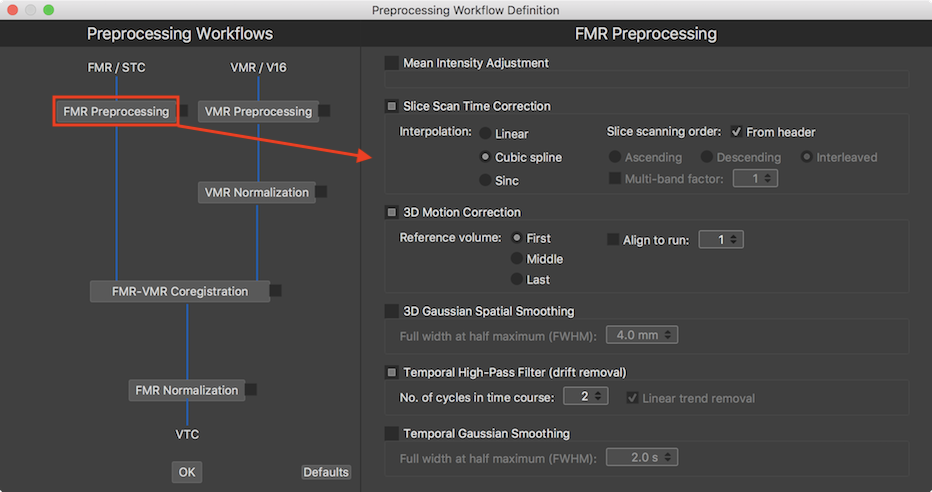
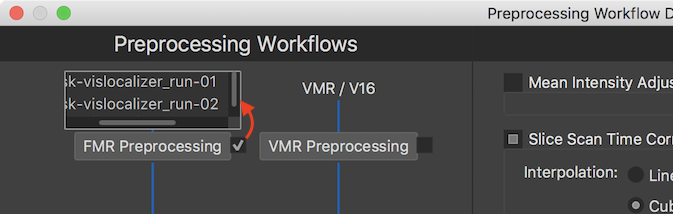
In order to include a sub-workflow in the desired preprocessing pipeline, the selection box on the right side of the workflow buttons need to be checked. This will open one or more document input lists that can be used to select the documents that will be processed by the respective sub-workflow. In the screenshot below the FMR Preprocessing selection box has been turned on and the appearing document input list contains FMR documents that can be selected for preprocessing as specified with the choices made on the right side.
The available sub-workflows forming a complete preprocessing pipeline will be described in subsequent topics. The following sub-workflows are currently available:
Sub-workflows can be added and executed one by one. More conveniently all planned sub-workflows can first be specified (at present one-by-one) and added to the workflow table to be executed subsequently in one go without user interaction. After running a full preprocessing pipeline with all preprocessing sub-workflows has been completed, anatomical (VMR) and functional (VTC) data sets will be available for all subjects, usually in a common space ready to be used as input for subsequent statistical workflow analyses.
Separate workflow folders with parameter file. Note that for transparency, the results of each sub-workflow are stored in a separate workflow folder under the project's "derivatives" folder together with a "parameters.json" file that documents the settings used when runnnig the workflow.