Turbo-BrainVoyager v3.2
Time Courses Container
The Time Courses Container allows to visualize multiple ROI time courses and beta plots arranged in a grid layout. The container pops up automatically when more than 2 (or 3) ROI plot windows are opened but it can be invoked any time by selecting the Show Time Courses Container item in the View menu.

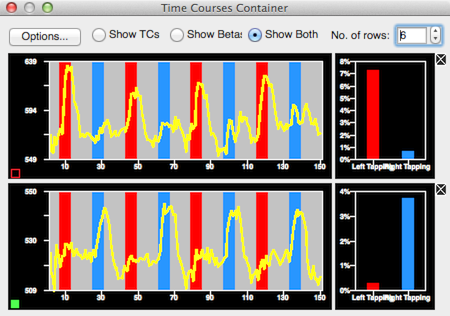
The visualization of time course data and estimated betas from all available ROIs provides a clear and manageable overview of all ROI signal time courses and is especially helpful when comparing several ROI time course plots in detail, e.g. when selecting regions for neurofeedback or (communication) BCI applications. When opening more time course plots than panels available in the TBV main window, the container automatically puts the new ROI time course in the next available slot in its grid layout. In previous TBV versions (< 3.2) each additional ROI plot was shon in a separate window often producing a cluttered display that is not optimal for inspecting data during real-time processing. The container simplifies comparison of plots since all plots are always displayed in the same size and the plot size is changed in the same way for each plot when changing the overall size of the Time Courses Container. The plots displayed show time course data as well as (GLM) beta bar plots if the Show Both option is checked (default) in the top section of the container. In order to show only the time courses or only the beta plots of available ROIs, click the Show TCs or Show Betas option, respectively. Note that the settings made here are also transferred to the ROI panels displayed in the main TBV window that always shows the first 2 or 3 (if motion correction is off) ROI time course plots.

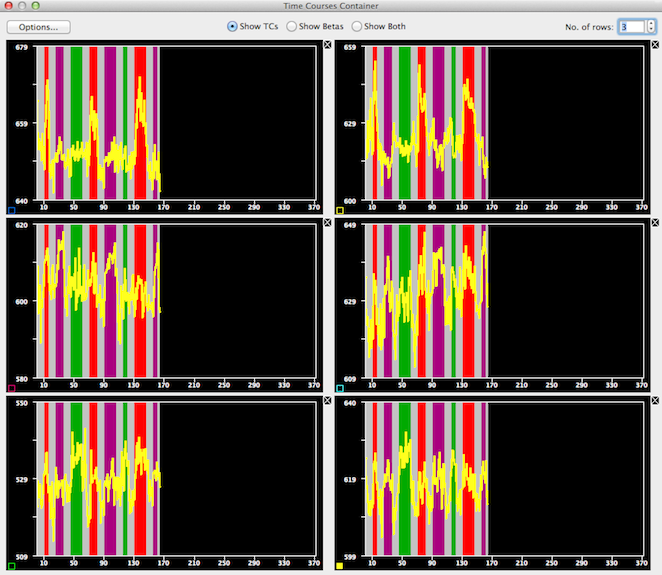
The layout of the grid can be adjusted by changing the value in the No. of rows spin box in the upper right section. As soon as more plots are added to the container than the number in this field (default value: 6), a new column will be started to hold the new plot(s). If, for example, two ROI plots are available, they would be shown below each other within a single column. To show them side by side, the value of the No. of rows spin box need to be set to value "1". In the snapshot above, six ROIs are available and their time courses and estimated betas are shown in one column as default during online processing. In this example, the 1st and 4th, 2nd and 5th and 3rd and 6th ROIs are related to the same task. In order to arrange the plots such that the same-task ROI are in the same row, the value in the No. of rows spin box has been set to 3 in the snapshot below. Furthermore, the Show TCs option has been selected to show the ROI time course plots without the beta plot.

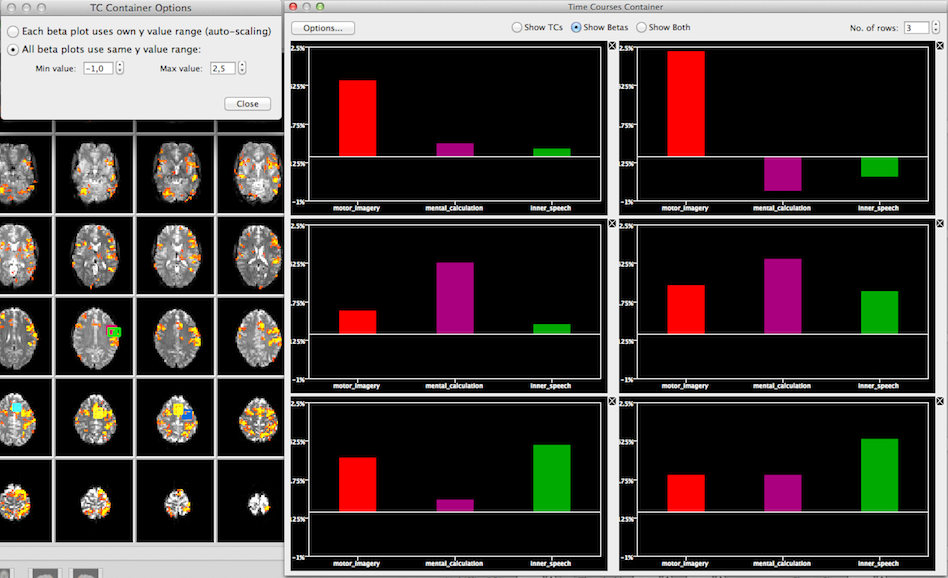
Further display options are available in the TC Container Options dialog that can be shown by clicking the Options button in the Time Courses Container. In order to easier compare beta plots across ROIs, you can force them to use the same y range by checking the All beta plots use same y value range option. You can modify the default values for the value range by changing the minimum and maximum y value with the Min value and Max value spin boxes, respectively. To switch back to the default display allowing each beta plot to automatically set the y value range, click the Each beta plot uses own y value range option.

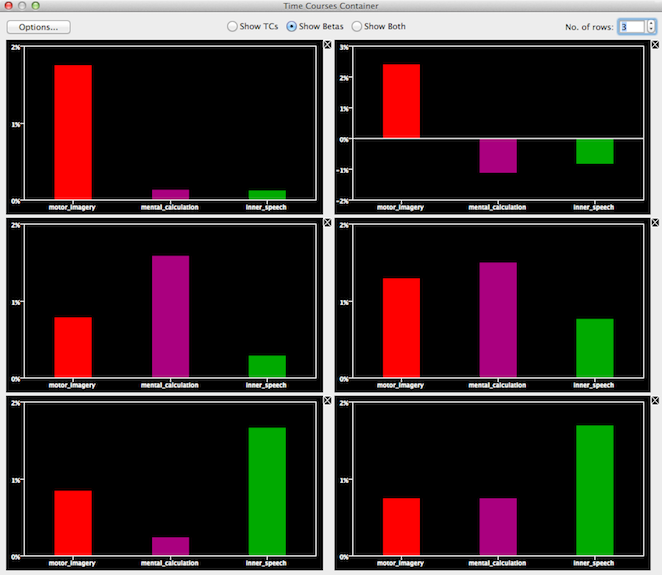
In the snapshot above the Show Betas option in the container has been selected to show only the beta plots of the six available ROIs. As can be seen, each plot uses an individually auto-adjusted range of y values and (absolute) comparison of the beta values can not be done easily. In the snapshot below the All beta plots use same y value range option has been selected in the TC Container Options dialog (see upper left side of snapshot) in order to use the same signal range for all ROI beta plots. In this example, the minimum of the signal range has been set to -1.0 using the Min value spin box while the maximum value has been set to 2.5 using the Max value spin box.

In case ROI plots are no longer needed, they can be removed from the Time Courses Container by clicking the X icon at the right side of a panel. If a plot has been closed, the space will be filled by other ROI plots (if available), i.e. plots with a higher index position are moved down by one position (this may visually lead to plots moving up). Note that closing panels will remove the respective ROI from the main window. In order to remove all plots at once, click the Remove ROI Time Course Plots item in the View menu.
Copyright © 2014 Rainer Goebel. All rights reserved.