Turbo-BrainVoyager v4.4
The TBV Settings Dialog
A ==TBV== settings file ("<name>.tbvj" or "<name>-<run#>.tbvj") contains all relevant information to analyze incoming functional data, including information about the scanner, data points, number of slices and matrix size. Since TBV 4.0, the settings are stored in JSON format (".tbvj" extension) replacing the earlier text format (".tbv" extension). The ==TBV Settings== dialog provides a convenient and save way to inspect, create or modify TBV settings files. Using an external text editor, you can also modify a TBV file directly. It is, however, recommended to use the TBV Settings dialog because it ensures that syntactically correct .tbvj files are created when clicking the Save or Save As button.
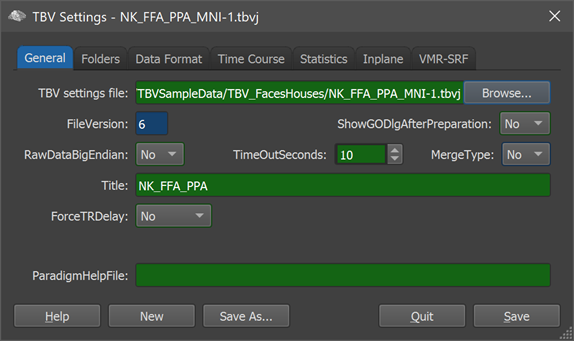
To open the TBV Settings dialog, click the Edit TBV File item in the Files menu. You will see several tabs describing various subsections of the TBV file. After launching the dialog, it will display the General tab (see screenshto above). The most important entry in this tab is the reference to the current ==TBV settings== file from which the information in the various tabs are retrieved and to which changes are saved. Using the ==Browse== button, another TBV settings file can also be selected and loaded into the dialog. To get a short tool tip explanation of an entry, locate the mouse cursor over a field without moving the mouse for a short time. To get more extensive information for each item, click the question mark on the right side of the dialog's title bar and then click on an item. You can also find a description of each field in subsequent topics and in the description of the TBV settings file.
### The General Tab
Besides the reference to the current TBV settings file, the ==General== tab contains some global options that usually need not to be changed. The ==TimeOutSeconds== entry defines how long the program will wait for data on disk when starting real-time analysis. If image data is not found after the specified time-out interval has elapsed (default: 10 seconds), TBV aborts the process. Before restarting real-time analysis, any potential issue with incremental data storage should be checked as well as the specified data folder (see ==Folders== tab).
The text in the ==Title== entry is usually the same as the name of the TBV file but can be adjusted freely; the provided text is also shown in the title bar of the Turbo-BrainVoyager window.
The ==ForceTRDelay== entry is off as default but can be set to YES if one wants to let TBV wait for the duration of the TR value (see ==Time Course== tab); this is not recommended for real-time analysis but may be useful to slow down TBV when re-running in quasi real-time mode, i.e. with original scanner input data already available on disk.
The ==ShowGODlgAfterPreparation== entry can be set to YES to halt the program after finishing preparation of internal data structures after starting real-time processing. In this case, the program will not read in data before the ==GO== button in a presented dialog has been clicked (or the Return button pressed).
### Overview of other Tabs
A TBV file specifies important folders that can be inspected and modified in the Folders tab. Details about (scanner-specific) image file formats are specified in the Data Format tab and described in subsequent topics. Information and settings about the used protocol and time course displays are accessible through the Time Course tab. Options controlling preprocessing, statistical analysis and visualization are accessible through the Statistics tab and described in topic Preprocessing and Satistics. The settings of the VMR-SRF tab are described in the Preparing Advanced Anatomical Spaces topic.
#### Color-Coded Entries
You will notice that the fields are filled with a background color. The purpose of these colors is to help you focus on the important information. The colors are defined as follows:
Red color: These entries must be correct to ensure proper real-time processing. Check the red values and modify them if necessary. As an example, the "WatchFolder", which is the directory where the real-time data arrives, must be specified correctly to ensure successful data analysis. If available in (DICOM) header files, most of the red marked fields will be filled correctly automatically.
Green color: These entries may be changed but they are not critical for proper real-time processing. Change these options to adapt the analysis and the display to your needs. As an example, you can chose to run 3D motion correction or not.
Blue color: These entries should normally not be changed. They reflect either important information which is automatically specified (i.e. by reading header information from the data files) or they reflect entries which are read-only or not (yet) used by the program. The ==FileVersion== entry in the ==General== tab, for example, has a blue background since it provides information that can not be changed.
Copyright © 2002 - 2024 Rainer Goebel. All rights reserved.