Turbo-BrainVoyager v4.4
Creating VMR Files
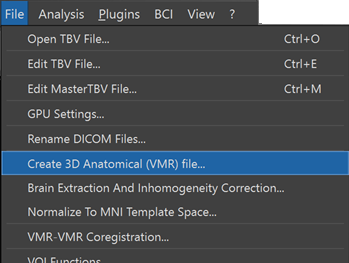
In order to create a 3D anatomical (VMR) dataset from original DICOM files, select the Create 3D Anatomical (VMR) File item in the File menu (see screenshot above). This will invoke the Create VMR from DICOMs dialog (see screenshot below).
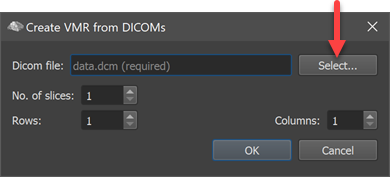
Use the Select button to invoke a standard File Open dialog and locate one of the DICOM files belonging to the anatomical 3D dataset. Usually the DICOM files will be recorded in the same session as subsequently performed functional (neurofeedback / BCI) runs and used for better visualization and volume-of-interest processing. After selecting a DICOM file, the No. of slices, Rows and Columns fields will be filled usually automatically. If they do not correspond to expected values, you can adjust them.
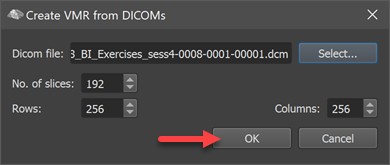
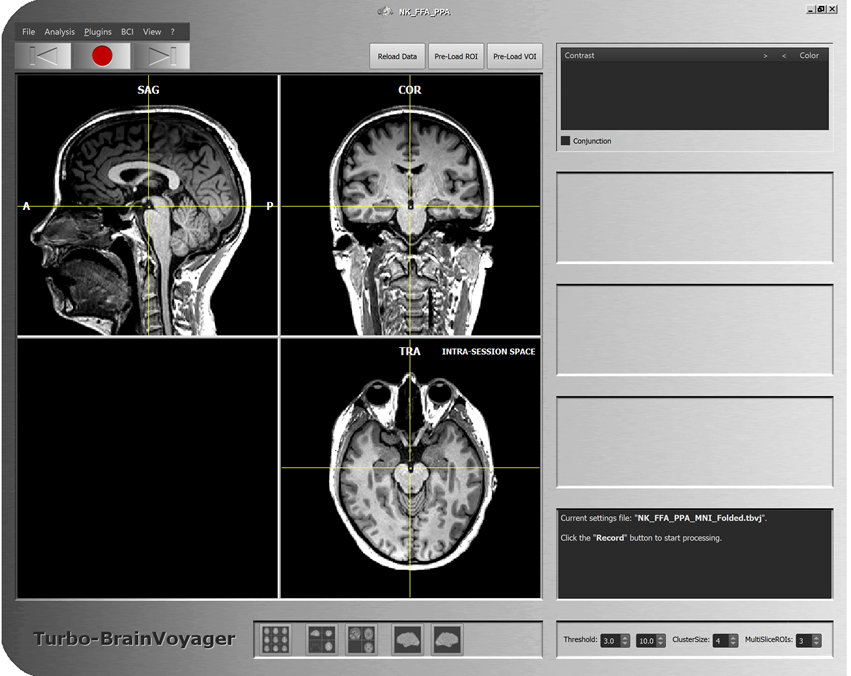
In order to create the VMR file, click the OK button in the Create VMR from DICOMs dialog (see screenshot above). The DICOM files will then be read from disk and the created VMR document will be shown in TBV's Volume View (see screenshot below).
The program also presents a Save As dialog and suggests the name "IntraSession.vmr" to store the created VMR file. Make sure that you select an appropriate folder before clicking the Save button. Note that the program also saves a 16-bit (V16) dataset under the same name, which are used by the subsequently recommended intensity inhomogeneity correction processing step.
Iso-Voxelation and Sagittal Reorientation
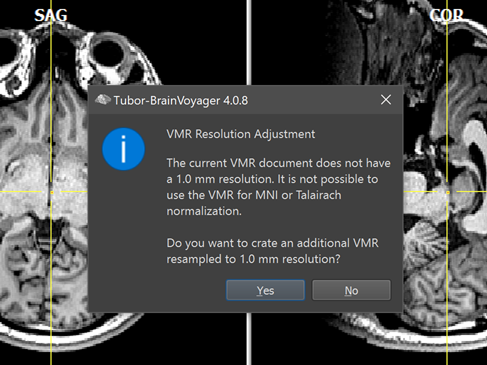
In case that the created 3D anatomical dataset was not recorded with 1 mm iso-voxel resolution in all dimensions, the program asks to resample data. To perform the resampling to 1.0 mm iso-voxel resolution, click the Yes button, otherwise click the No button. After iso-voxelation, the program saves the file automatically under the original name appending the substring "_ISO-1mm", e.g. the file IntraSession.vmr will be saved in the same location as "IntraSession_ISO-1mm.vmr". The iso-voxelation step is highly recommended since TBV does not support non-1mm iso-voxel data for MNI or Talairach normalization. Note also that the original data is kept on disk, so you can use the non-1mm iso voxel dataset for visualization in scanner (native) space.
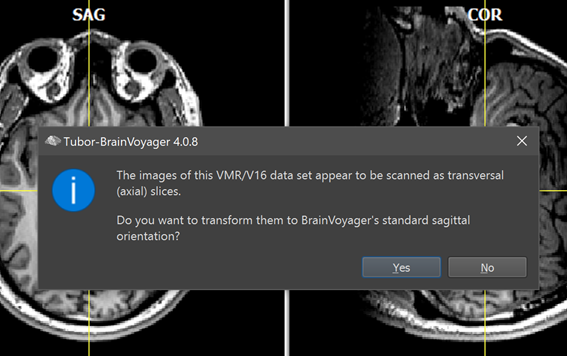
In case that the created 3D anatomical dataset was created from slices that were scanned in axial or coronal orientation, the program offers the possibility to reorient the dataset in its expected standard sagittal orientation (see screenshot above). To perform the reorientation, click the Yes button, otherwise click the No button. After sagittal reorientation, the program saves the file automatically under the original name appending the substring "_SAG", e.g. the file "IntraSession.vmr" will be saved in the same location as "IntraSession_SAG.vmr". If you have created a dataset that also got iso-voxelated, the resulting file name will be "IntraSession_ISO-1mm_SAG.vmr". The To-SAG step is highly recommended since TBV expects 3D anatomical data in sagittal orientation. If not performed, descripitve labels (SAG, TRA, COR) will be displayed for wrong slice planes and navigation will be difficult. It is also not possible to normalize non-sagittal 3D datasets into MNI, ACPC or Talairach space.
The created VMR document can now be further processed using the intensity inhomogeneity correction tool.
Copyright © 2002 - 2024 Rainer Goebel. All rights reserved.