BrainVoyager v23.0
The QML / JS Script Development Window
The QML / JS Script Development window (see screenshot below) is the main user interface component of BrainVoyager's scripting tools.
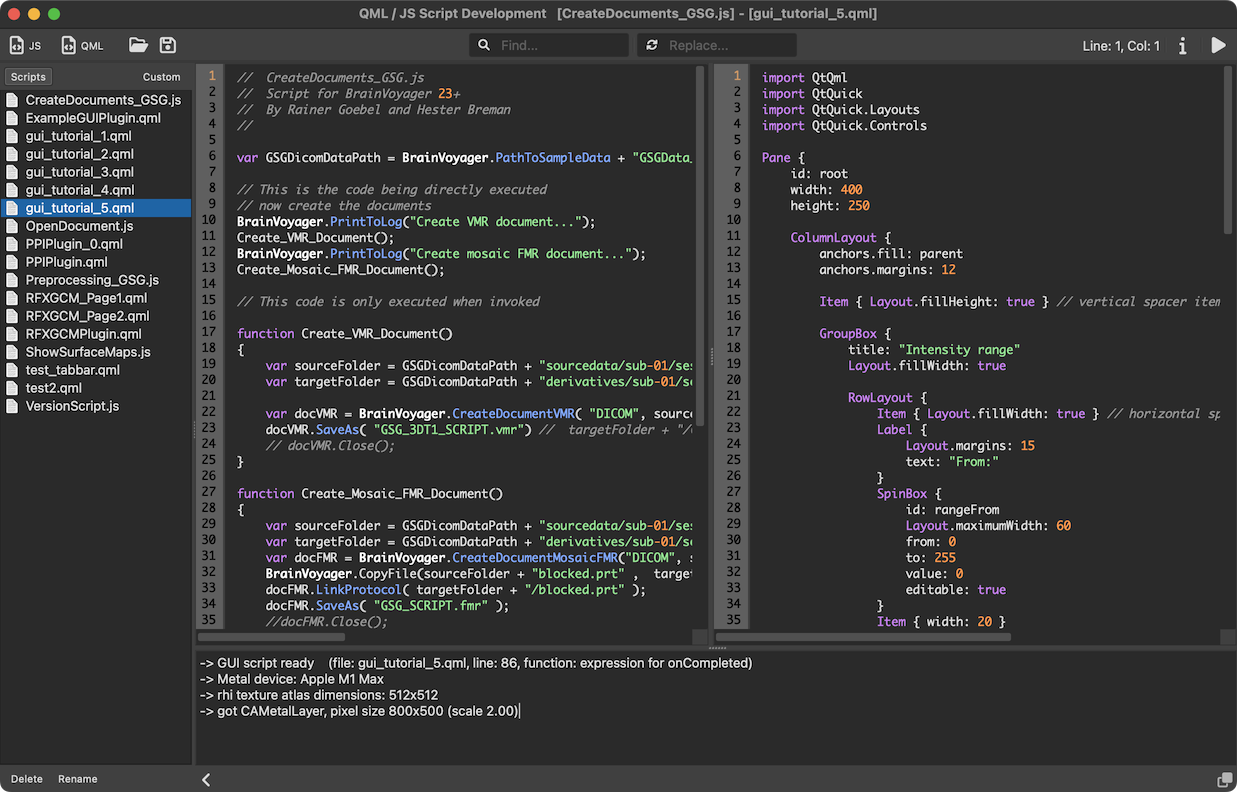
The main part of the development window consists of one or two JS/QML Code Editors. On the left side of the editor section is the Files pane containing a list of JS and QML files in one of 2 folders that are accessible via 2 buttons at the top of the panel. The folder named "Scripts" refers to the standard BrainVoyager folder where example scripts are placed after installation. The folder is located in the 'Documents/BrainVoyager/Extensions' folder and named 'Scripts'. The second folder is initially named "Custom" but as soon as a JS or QML file in a folder other than the default 'Scripts' folder is loaded, the name of the 'Custom' selection button will change to display the name of the folder containing the opened file. It is also possible to select a custom folder by using the Select Folder item in the File menu of the QML / JS Script Development window. Clicking one of the two folder selection buttons will show the JavaScript ('.js') and QML ('.qml') files of the respective folder in the File List panel below the buttons. Note that the width of the Files pane can be adjusted using the splitter that separates it from the editor(s) on the right. The Files pane can also be completely closed by using the Show / Hide Files Pane (left or right pointing) icon in the bottom toolbar.
Another important part of the development window is the top Toolbar that contains icons to access the most important functions of the window's menu. The toolbar also contains fields for searching and replacing text (see explanations below) and it displays the position (current line and column) of the cursor in the active editor. Clicking the Open Scripting Guide ("Info") icon will launch this page of the User's Guide. Note that for details about the scripting API and development of QML user interfaces, consult the [updated scripting manual] located in the Getting Started Guide folder.
Note that the developer window can be set to always stay on top of other windows, which might be useful to prevent that the window gets hidden behind BrainVoyager's main (or other) window. To make the window stay on top, check the Window Stays On Top icon in the right lower corner of the window. This icon is a toggle, i.e. you can press it again to turn off the "stays on top" behavior if desired. Note that the window is hidden automatically when running a QML / JS file. This can be changed by toggling the Hide Window While Running Script option in the Window menu.
Working with Files
The development window shows either one or two code editors. If one editor is shown, one can use the Split Side by Side item in the Window menu to open a second editor. The splitter separating the two editors can be moved freely to the left and right to adjust coding space as needed. Having two editors open makes it easy to edit and compare two related files and to copy code pieces from one editor to the other one using the standard CTRL-C and CTRL-V keyboard shortcuts. If one does not need two editors, one can close one of the editors by using the Close Current Editor item in the Window menu. The editor that is closed is the one that is 'current', which means that it is the editor that has keyboard focus (blinking cursor). An editor can be make current by clicking inside its content area. This will also highlight the file and folder in the Files pane that corresponds to the file in the selected (current) editor. The names of the file(s) thar are open in the editor(s) are also shown in the title bar of the development window. When opening a new file, it will be loaded into the currently selected editor.
Files can be opened by double-clicking a file in the Files pane, by using the Open JS / QML File icon in the window's toolbar or by using the Open item of the window's File menu. Files can also be opened by using the standard CTRL-O (CMD-O on macOS) keyboard shortcut as long as the development window is the active window, otherwise the Open File action of BrainVoyager's main window will be triggered. If two editors are visible, the opened file will be loaded into the currently selectede one. Modified Python files can be saved using the standard CTRL/CMD-S keyboard shortcut, the Save JS / QML File icon in the toolbar or the Save item in the File menu. A file can be saved under a new name by using the Save As item in the File menu or the SHIFT-CTRL-S (SHIFT-CMD-S on macOS) keyboard shortcut. A new JavaScript file can be created by clicking the Create New JS File icon in the toolbar, the New JS item in the File menu, or simply by pressing the CTRL-N (CMD-N on macOS) shortcut on the keyboard. The created empty file will be named 'untitled.js'. A new QML file (that can contain also JavaScript code) can be created by clicking the Create New QML File icon in the toolbar, or the New QML item in the File menu. The created new QML file will contain a few lines of code defining a simple "Hello World" dialog.
While you can save a file under a new name, it might be sometimes desirable to remove or rename a file. This is supported by the Files pane, which has two buttons at the bottom: Delete and Rename. When pressing the Delete button, the selected item in the displayed file list will be removed from disk. Note that this action can not be undone! When clicking the Rename button, the currently selected file will become editable in place, i.e. one can type a new file name right in the Files pane. A file name can be made editable even easier by simply clicking a second time on a selected file.
To execute the code in the current editor, simply press CTRL-R (CMD-R on macOS), or click the Run Script Code icon on the right side of the window's toolbar, or use the Run tem in the File menu. Note that the current (modified) code in the editor is automatically saved when starting the script interpreter.
The QML / JS Code Editor
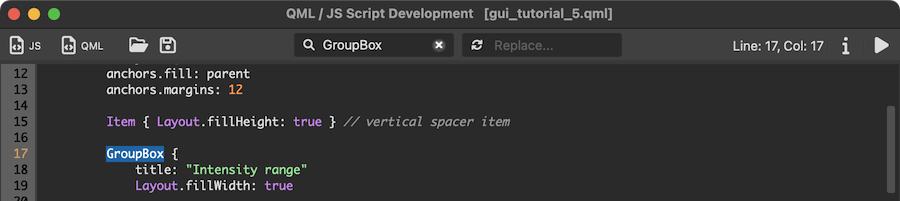
The editors of the QML / JS Script Development window support syntax highlighting of JavaScript and QML / QtQuick keywords as well as operators, quoted text, numbers and comments in a suitable way for both dark and light theme appearance. Importantly, the editor highlights all properties and methods that belong to the application programming interface (API) provided by BrainVoyager. These properties and methods are accessed in code by the (also highlighted) 'BrainVoyager' or 'bv' symbol as well as via BrainVoyager documents, which makes it possible to write scripts that mix JavaScript calls with rich BrainVoyager functionality. The provided JavaScript API is described in detail in the [Scripting] guide.
Indentation Support
The editors support indentation. When pressing the 'Tab' key, four spaces will be inserted at the present cursor position and the cursor will be advanced accordingly. Also when pressing the 'Return' key, the editor will try to place the cursor at a position in the following line that supports typical coding by using proper indentation. The editor also supports multi-line indentation properly supporting the often needed task to indent code sections inwards or outwards. If a multiline code section is selected by the cursor, clicking the Tab key will insert 4 blanks at the begin of all lines that are marked by the selection. To indent by multiples of four spaces, simply press the Tab key repeatedly. To remove four blanks (when possible) from the lines of a multi-line selection, the ALT-Tab (Option-Tab on macOS) key combination can be used.
Find and Replace
The editors also support standard Find and Replace functionality. Pressing CTRL-F (CMD-F on macOS) will activate the Find text box in the main toolbar where text can be entered. In case a word (or segment) in a single line has been selected, the selected text is automatically placed in the Find text box.
 The entered text can be searched by hitting the Return key. To search for more matching text, simply press the Return key repeatedly or use the standard CTRL-G (CMD-G on macOS) keyboard shortcut. To replace a matching text snippet with a new text, enter the new text in the Replace text box in the toolbar. If the first matching text is found, click on the Return key to replace the matching text with the new text. The editor will then automatically highlight the next matching text if available. You may also search and replace by clicking first the Search icon in the Find text box followed by a click on the Replace icon in the Replace text box. Note that you can undo text replacements using the standard CTRL-Z (CMD-Z on macOS) keyboard shortcut or Find via the Undo item in the Edit menu.
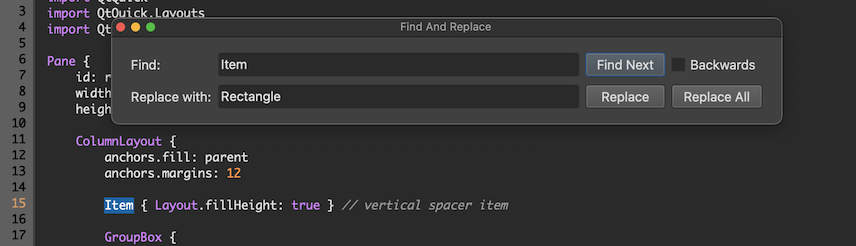
In case you want to search backwards or if you want to replace all matching texts at once, you can also use the Find and Replace dialog, which can be invoked using the Find / Replace... item in the Edit menu.
Other Features
Using the standard CTRL+ and CTRL- zoom keyboard shortcuts (or via the respective items in the View menu), it is possible to increase or decrease the size of the font in the editor(s).
Copyright © 2023 Rainer Goebel. All rights reserved.