BrainVoyager v23.0

Volume Rendering
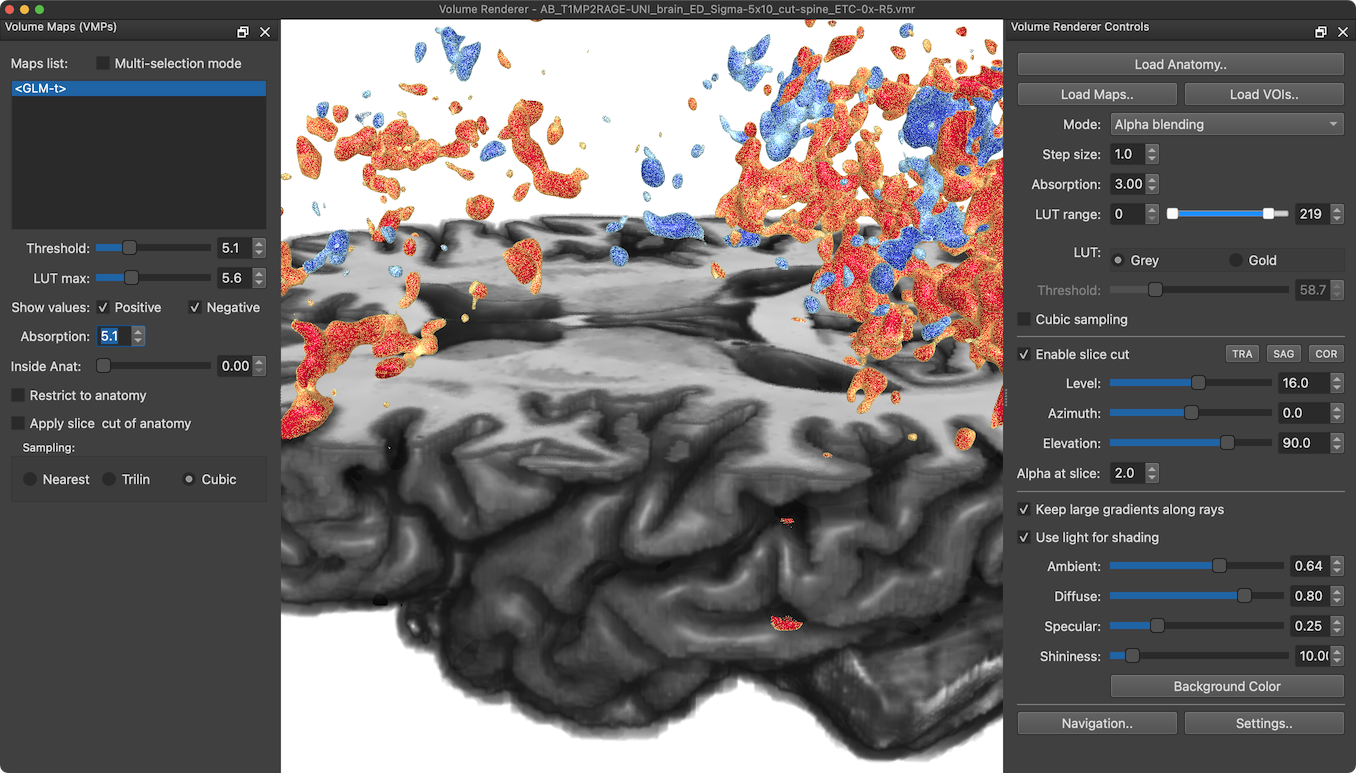
Useful visualizations of neuroimaging data is an important means to help in understanding complex anatomical and functional information. Surface rendering of reconstructed meshes is an important way to visualize data in BrainVoyager for several major reasons, including: 1) It allows morphing of meshes, e.g. for inflation, flattening of cortex meshes as well as for cortex-based alignment, 2) it supports additional functionality such as boundary based registration, and 3) it allows fast navigation of rendered meshes, e.g. it is as easy and fast to rotate and zoom the scene to investigate meshes from any desired point of view. Volume rendering is another technique that is often used to visualize volumetric data. Volume rendering is another important approach to visualization, which can handle some visualization aspects better than surface rendering, including transparency and rich depth information, but it is often slower and more difficult to use than surface rendered meshes. BrainVoyager 23.0 introduced a new volume renderer that provides advanced high-quality renderings while maintaining fast interactive manipulations. Due to its advanced features, better integration and usability, it replaces the volume rendering tools offered in earlier versions of BrainVoyager.
Note. The former "high-res data volume renderer" is still available in BrainVoyager 23.0 because it offeres a special mode for rendering flattened cortical patches, including 3D text labels for cortical extent and depth. It is planned to add a similar mode also to the new volume renderer in a later release.
The creation of rendered views in a few 10th of milliseconds is achieved by exploiting the power of modern programmable graphics hardware. Modern graphical processing units (GPUs) consist of many parallel processing pipelines that are not only able to visualize 3D graphics, but allow to execute a set of instructions in a similar way as standard computational processing units (CPUs). While standard CPUs are also adding increasing parallelism via multiple processor cores, the number of cores is usually small when compared to the hundreds of processing 'kernels' in modern graphics cards. Computational problems that execute the same code on different pieces of data benefit most from a programmable parallelized compute GPU. This 'data parallel' approach fits well to volume rendering since an essential component of its calculation is the submission of rays from an image plane into a volume (raycasting): Instead of calculating the result sequentially ray by ray, programs written in a shading language can be stored on the GPU to execute multiple rays in parallel. This reduces the overall calculation time substantially, i.e. the overall raycasting problem is typically calculated 10 -100 times faster than CPU-based raycasting.
Launching the Volume Renderer

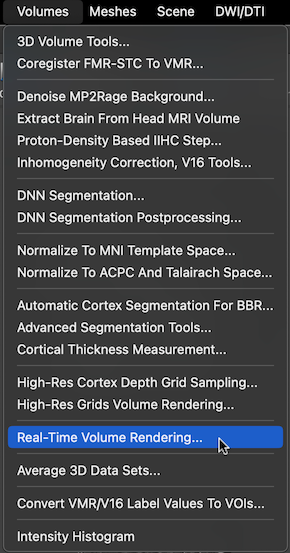
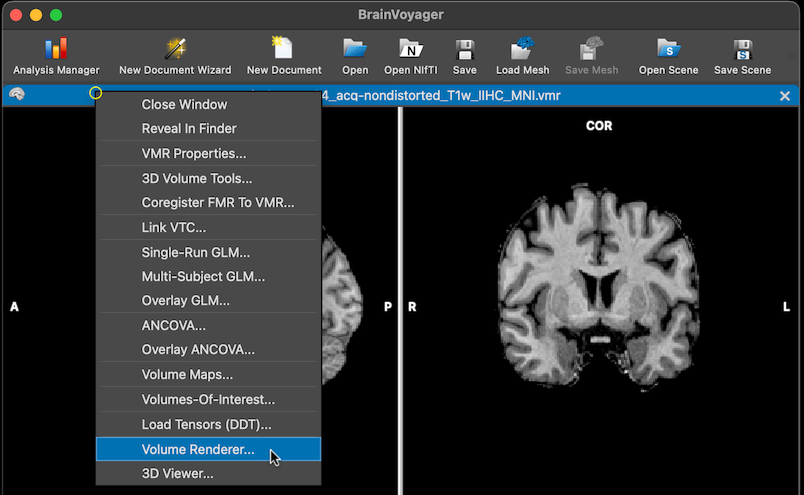
The Volume Renderer can be started using the Real-Time Volume Rendering item in the Volumes menu (see screenshot above). A more convenient way to start the renderer is by using the context menu of the title bar of a VMR View (see screenshot below).

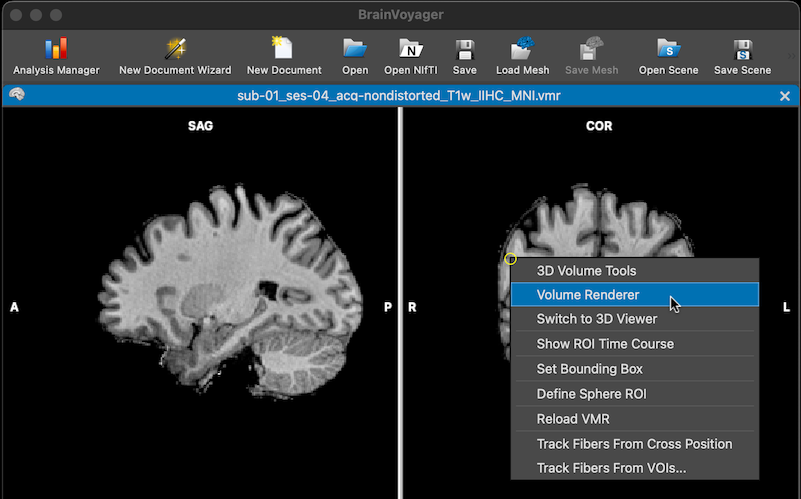
The context menu can be invoked by right-clicking (or Option-clicking on macOS) the title bar (see yellow circle, which marks the right-click location in this example). Yet another convenient way to start the Volume Renderer is by using the context menui nside the contents area of a VMR View (see screenshot below).

The next topic describes how to render anatomical volume data (VMRs) with the real-time volume renderer.
Copyright © 2023 Rainer Goebel. All rights reserved.